Equipment Needed
- 9×9 inch or 9×13 inch baking pan (line with parchment paper for easy lifting!)
- Food processor or large zip-top bag and rolling pin
- Medium and large mixing bowls
- Heatproof bowl for melting
- Spatula
- Measuring cups and spoons
Step-by-Step Instructions
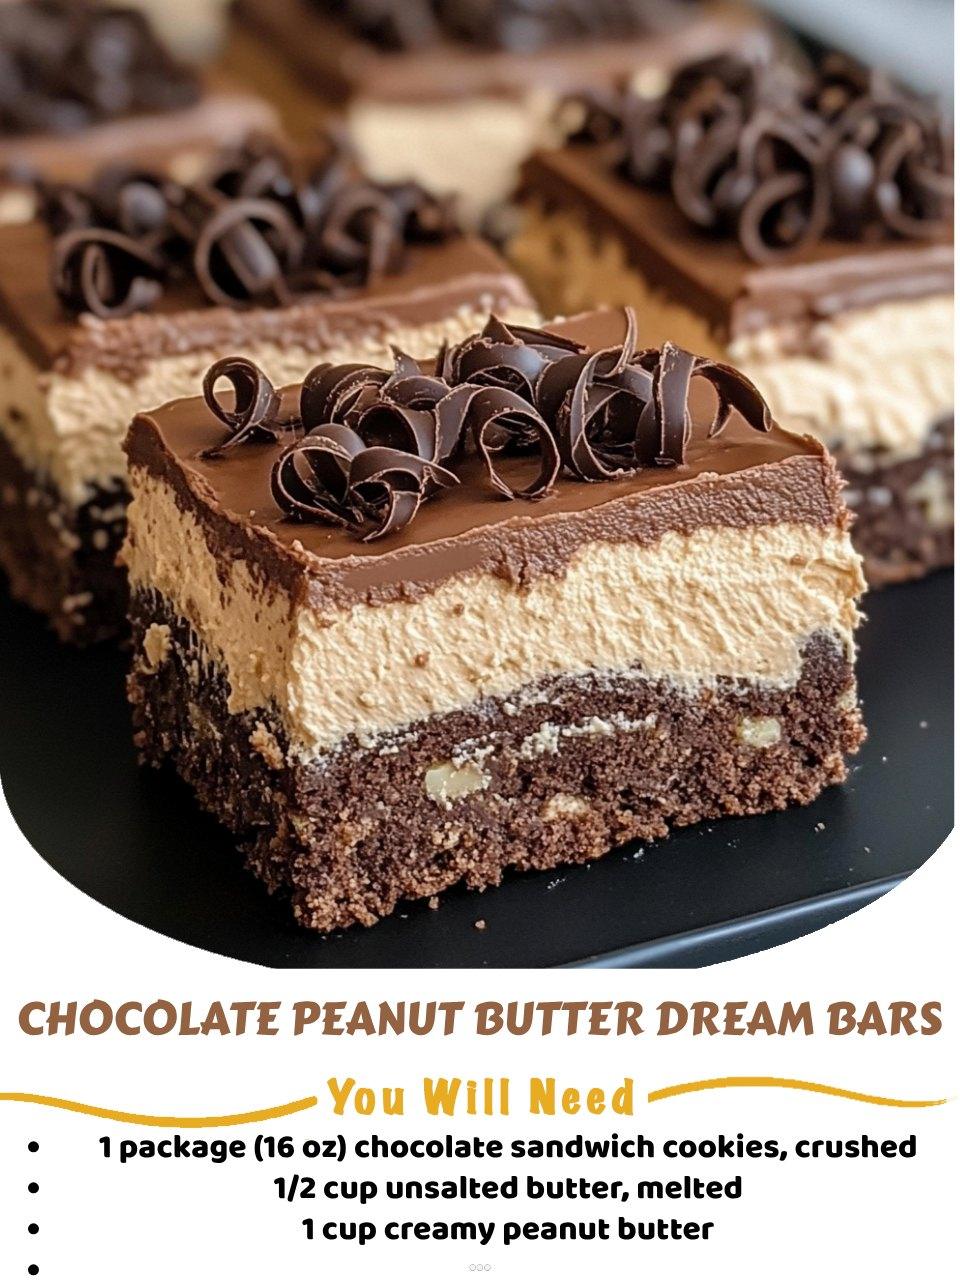
I always start by lining my pan with parchment paper, leaving an overhang on two sides. This is my non-negotiable tip for clean, easy removal—trying to pry these rich bars out of an unlined pan is a nightmare. Next, I make the crust. I place the entire package of chocolate sandwich cookies (creme filling and all) into my food processor and pulse until they become fine, even crumbs. If you don’t have a processor, put them in a sturdy zip-top bag and crush them with a rolling pin. You want the texture of wet sand. I pour these deliciously dark crumbs into a bowl and stir in the melted butter until every crumb is coated and the mixture holds together when pinched.
I then dump this buttery crumb mixture into my prepared pan. Using the bottom of a measuring cup or a flat glass, I press it down firmly and evenly into a solid, compact layer. This is crucial! A loosely pressed crust will crumble when you cut the bars. I press it up the sides just a tiny bit to create a slight wall for the filling. Once it’s perfectly smooth and packed, I pop the whole pan into the freezer for 10-15 minutes. This chills the butter and sets the crust, creating a solid foundation that won’t mix with the next layer.(See the next page below to continue…)